Roog
RCTalk Champion
- Thread starter
- #21
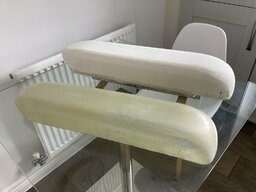
Apologies for duplicating it here but I thought I would finish off this thread with a picture of the form for my car body cut and sanded from insulation foam. Next I need some GRP.

I will continue the body build in the ‘Scratch build tethered race car’ thread.
I will continue the body build in the ‘Scratch build tethered race car’ thread.