HMS
U.S. Army Veteran
Greetings,
I am new to the forum and hope this insight is useful.
After 2 weeks of running my new X Maxx on our property, I realized—the roof was taking hits in rollovers, and the skid plates grind over jumps.
My goals for my X Maxx—reliable high speed off-road/jumper, desert truck (no concrete only dirt/rocks/grass), 40mph top speed, and replace things that will break with quality components.
1. Lower the CG (center of gravity): Add weight on the undercarriage to lower the CG while adding 2mm steel.
2. Ensure that hard hits do not concentrate/transfer forces into the weakest component(s): By adding 2mm steel as modular armor vs. removing/replacing plastics composites with metal should avoid that—as the modular is a layer on top of the composite. There are aftermarket pieces where you remove the plastic/composite and replace with aluminum—which does not add more weight low and creates impact transfer issues (aluminum vs. plastic/composite).
3. Learn what works and does not for the X Maxx in a respectful manner. I’m a novice to this truck.
That said, here is what I added:
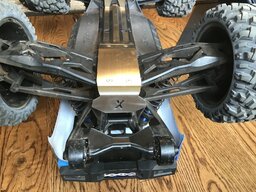
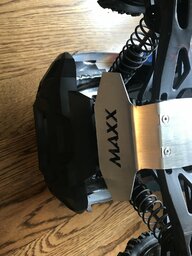
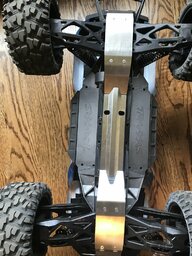
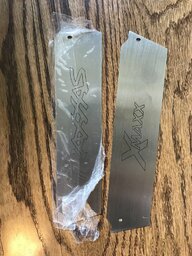
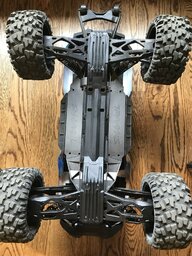
1. 20 minute install: Underbody skid plates from Amazon (note: I mounted only the 3 center skid plates (it came with outer plates which are engraved with “Traxxas and X Maxx”, which I don’t need as I want the mass around the center of the truck)—plus nothing hits the bottom off center (unnecessary weight).
2. 30 minute install: Roof skid plate was installed by my local dealer (it works as advertised based on the gouges when I rolled the truck while chasing the dogs).
NOTE: The center piece fits perfectly and notches under the rear skid plate—which locks it in place. Be careful, as that 3M tape is not forgiving—recommend notching the rear first and then aligning the front fitment.
Here are a few photos.
I am new to the forum and hope this insight is useful.
After 2 weeks of running my new X Maxx on our property, I realized—the roof was taking hits in rollovers, and the skid plates grind over jumps.
My goals for my X Maxx—reliable high speed off-road/jumper, desert truck (no concrete only dirt/rocks/grass), 40mph top speed, and replace things that will break with quality components.
1. Lower the CG (center of gravity): Add weight on the undercarriage to lower the CG while adding 2mm steel.
2. Ensure that hard hits do not concentrate/transfer forces into the weakest component(s): By adding 2mm steel as modular armor vs. removing/replacing plastics composites with metal should avoid that—as the modular is a layer on top of the composite. There are aftermarket pieces where you remove the plastic/composite and replace with aluminum—which does not add more weight low and creates impact transfer issues (aluminum vs. plastic/composite).
3. Learn what works and does not for the X Maxx in a respectful manner. I’m a novice to this truck.
That said, here is what I added:
1. 20 minute install: Underbody skid plates from Amazon (note: I mounted only the 3 center skid plates (it came with outer plates which are engraved with “Traxxas and X Maxx”, which I don’t need as I want the mass around the center of the truck)—plus nothing hits the bottom off center (unnecessary weight).
2. 30 minute install: Roof skid plate was installed by my local dealer (it works as advertised based on the gouges when I rolled the truck while chasing the dogs).
NOTE: The center piece fits perfectly and notches under the rear skid plate—which locks it in place. Be careful, as that 3M tape is not forgiving—recommend notching the rear first and then aligning the front fitment.
Here are a few photos.
Attachments
-
 488944BC-CD75-4700-848B-399DFF2BDE80.jpeg340.7 KB · Views: 281
 -
 C9442C18-9B34-4BD0-9EAD-AF7972350C72.jpeg237.2 KB · Views: 207
 -
 55A69A22-EE26-4D0D-8071-F627F267D273.jpeg207.6 KB · Views: 202
 -
 2FC14914-CB33-48F7-8D90-53DF09587DDC.jpeg376.3 KB · Views: 156
 -
 DDF6D5B9-90E3-4F85-A2AE-9295432E18DB.jpeg275.6 KB · Views: 162
 -
 1ED22CDC-7A9D-401A-A3EF-C2E4C188D42E.jpeg396.6 KB · Views: 155
 -
 5A0D8ED6-DC91-4A24-B051-5D1E07AEA469.jpeg491.9 KB · Views: 194
 -
 87D0FD57-FEF5-44D8-AAC3-A713986C6C07.jpeg460.5 KB · Views: 163


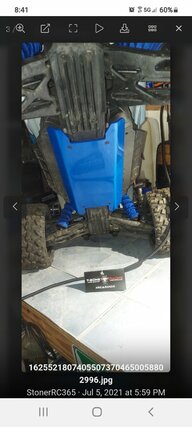
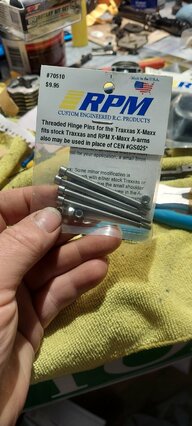
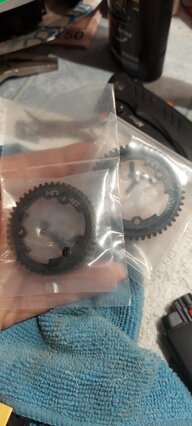
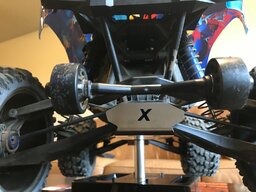
 but with the correct tires and gears it will drive on water.. this is my X skid . And shock covers the skid floats it's not against the center plate like other do like you mentioned.. the shock covers are from fullforcerc.com. and these are the hinge pins go in the holds lower arm to bulkhead and extra set of steel gears just in case I have.. along with a bunch of other stuff chassis slap is when the bottom of your truck slaps the ground when landing from a jump