If any of you have seen my slash project thread then you know I am waiting on supplies to do up a body and finish that project. In the mean time I decided I needed to revive my team Associated SC8 and thought I would show some pics of the process.
For those that haven't seen an SC8, it is a nitro powered 1/8th scale short course truck. It is one of my favorite trucks and I actually bought it thinking there would develop a class for them so I could get in to racing. But other rc makers didn't get on board with the 1/8th nitro platform so it never developed. It then became a part time basher truck that I ran mostly on parking lots and on hard packed snow. Overall though it hasn't had that much Use.
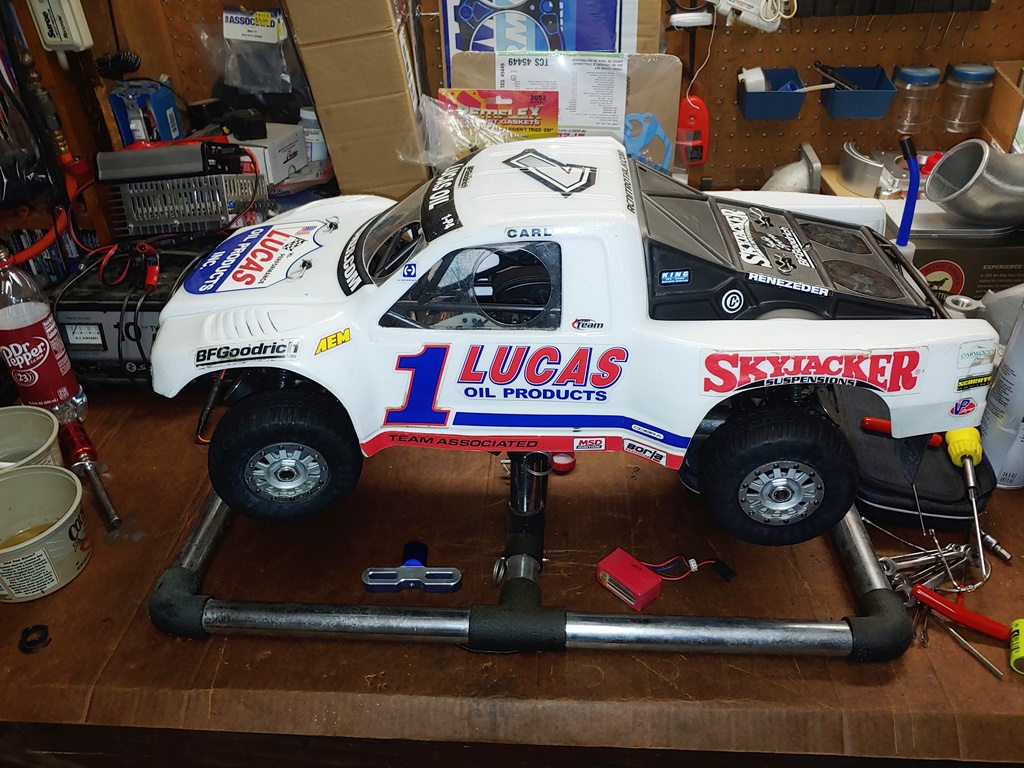
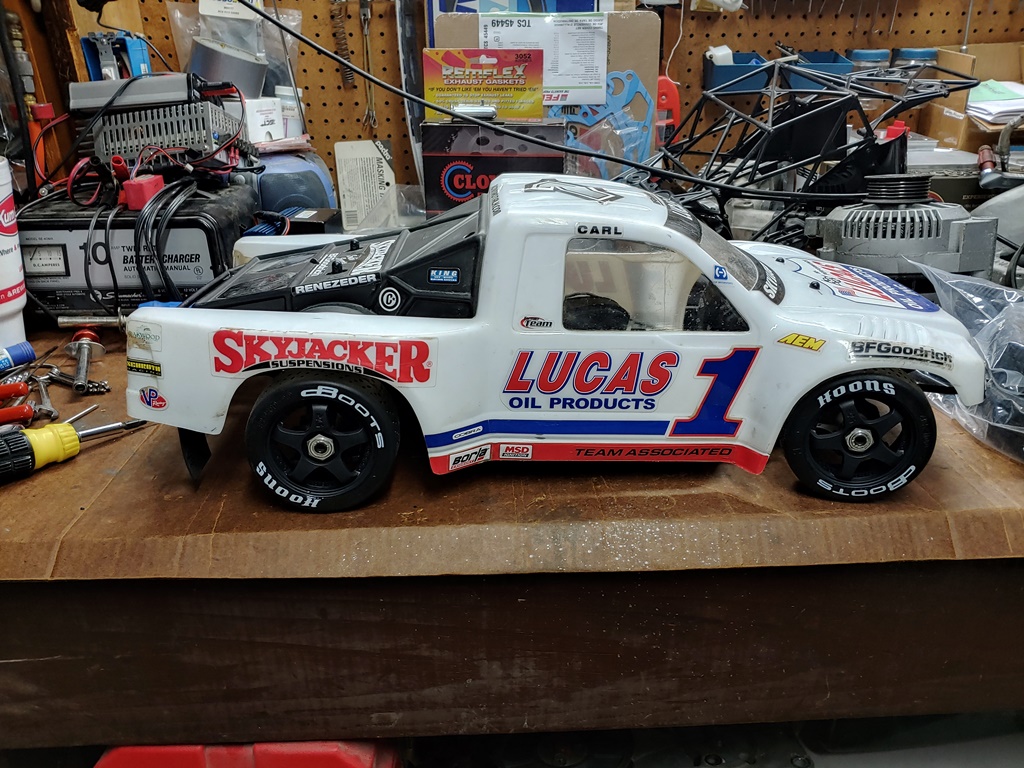
Ok, so let's get a look at it. I got l bored and lazy before I quit the hobby a few years ago so as you can see in the pic, it's a bit dirty.
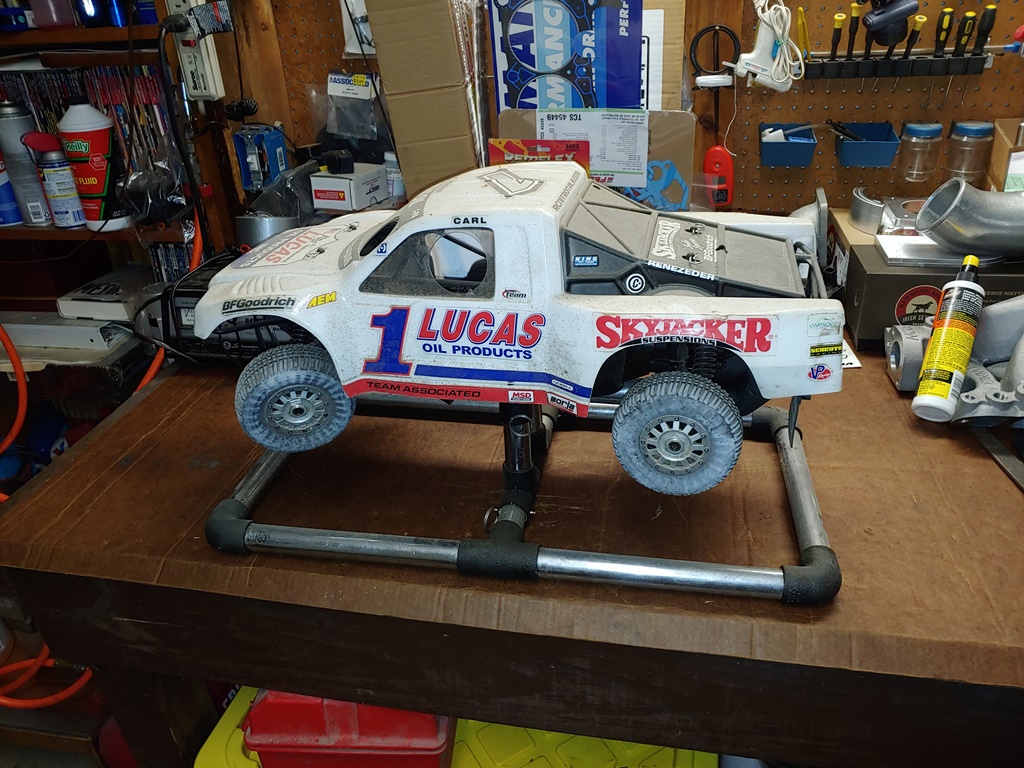
The tires look dried out a bit too or that's salt from the road because if I remember correctly, a snow covered road was the last time I ran it. Let's pop the lid off and see how she looks under there.
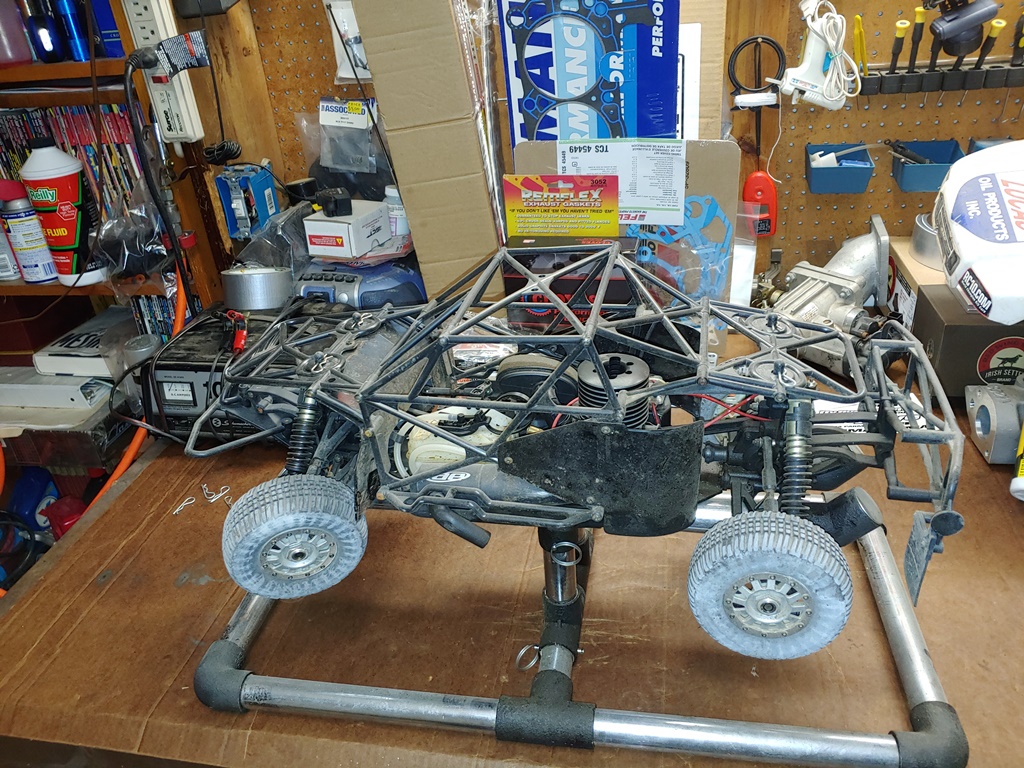
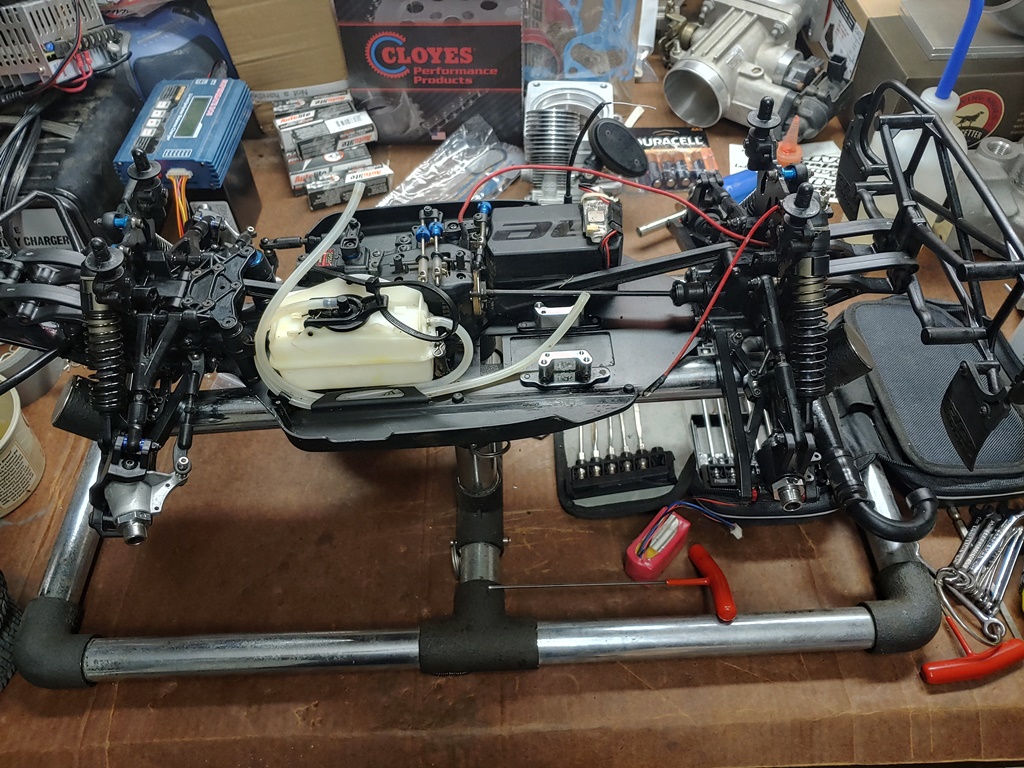
oh yeah, there's the cage. That is one of the coolest features on the truck. It may be plastic but it's tough and does a great job protecting the import parts of the truck. It just mounts on the same way and on the same posts as the body. Let's get'er off and see what we have to work with.
Well I've seen worse. The motor is stuck, no surprise to me, and I see the rear sway bar end is not connected. A little more inspection reveals a loose and I assume, worn out steering link. The rest seems ok so I pull the wheels and the motor and pipe so I can start the repairs.
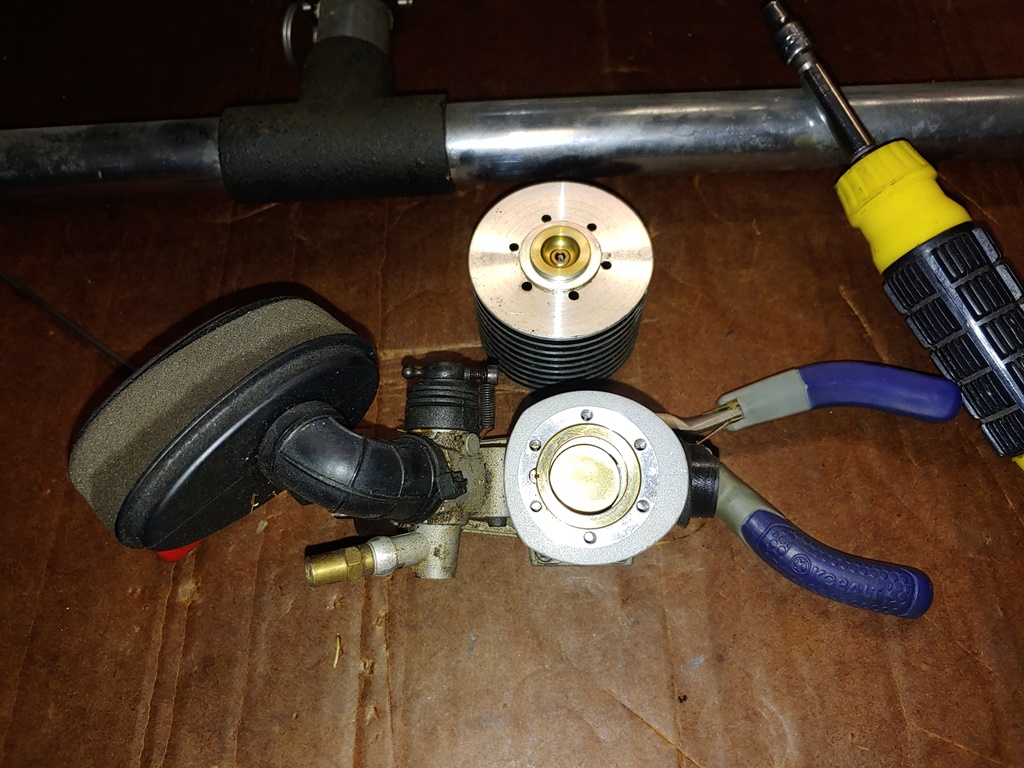
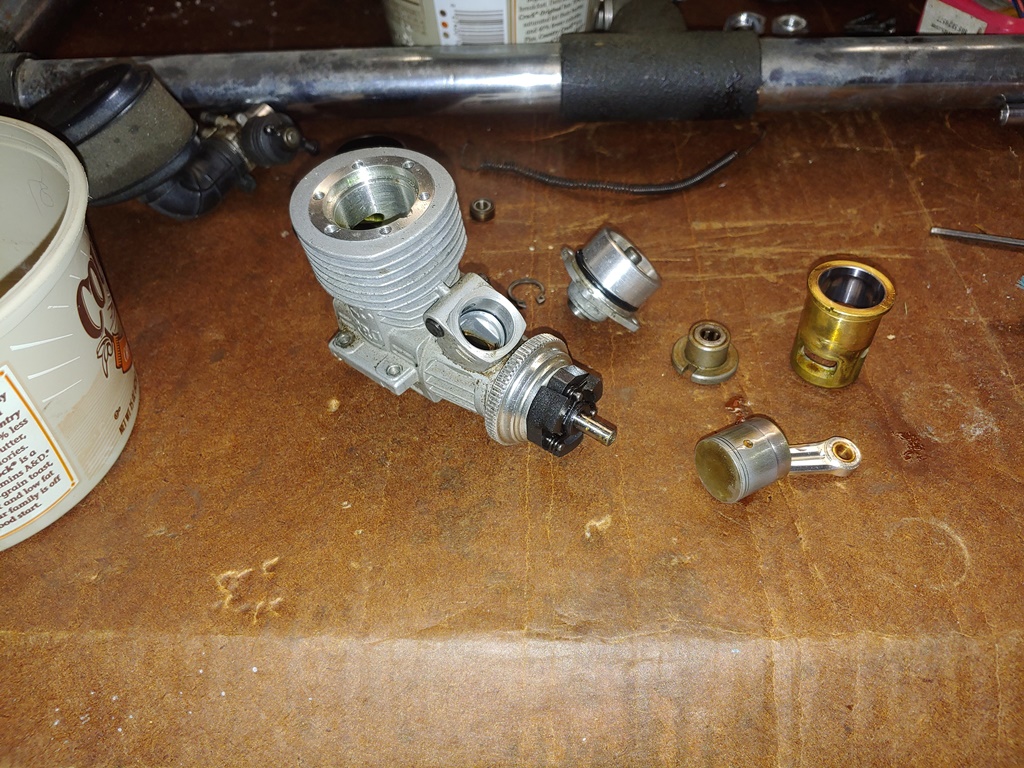
I will start with the engine. Removal of the cooling head and back plate reveals gummed up internals but no severe damage I can see. So I will remove the carb and soak the block and back plate with WD-40 and let it sit for a while.

In the mean time I will move on to checking my battery situation. OOOPS!!! I left batteries in 2 of my igniters and in the receiver box. Luckily the connection in the receiver box only has a slight amount of corrosion and is easily brushed off. Likewise, the red igniter is light and I am able to easily clean it up too. The blue igniter however looks pretty bad. To clean it I try the same solution of baking soda and water that works great on lead acid battery corrosion on a real car. This corrosion from alkaline batteries doesn't seem to work very well. But I will let it soak and move on.
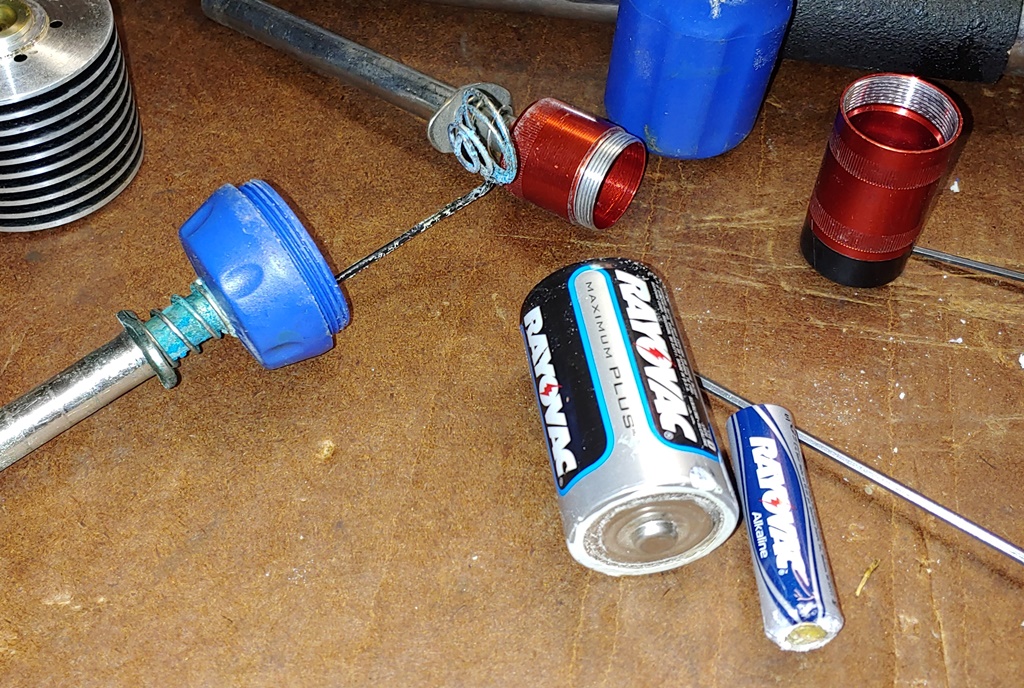
I had wrapped paper around an AA battery to make it work in the red igniter but it actually uses sub-c cells. I have 2 on hand and surprisingly both have some charge in them. I picked the one with the highest charge reading and just for heck of it I hooked it on the glow plug. It actually lit the plug! So I dug out both of my chargers and started charging both the igniter and the LiPo receiver battery. Then I got the transmitter. Again I had left the batteries in it but to my surprise there was no corrosion and they were still good. Ok, so let that stuff be and move back to the engine.
Using pliers I rocked the flywheel back and forth and kept plenty of WD-40 on it. Without too much effort it free'd up and I was able to rotate the crank. I went ahead removed the piston and sleeve. I continued to lube and spin the crank but there was roughness in the bearings that wasn't going away. So I grabbed an empty butter container, filled it with old fuel and dropped the block assembly in. I quit for the day here to let it soak overnight.
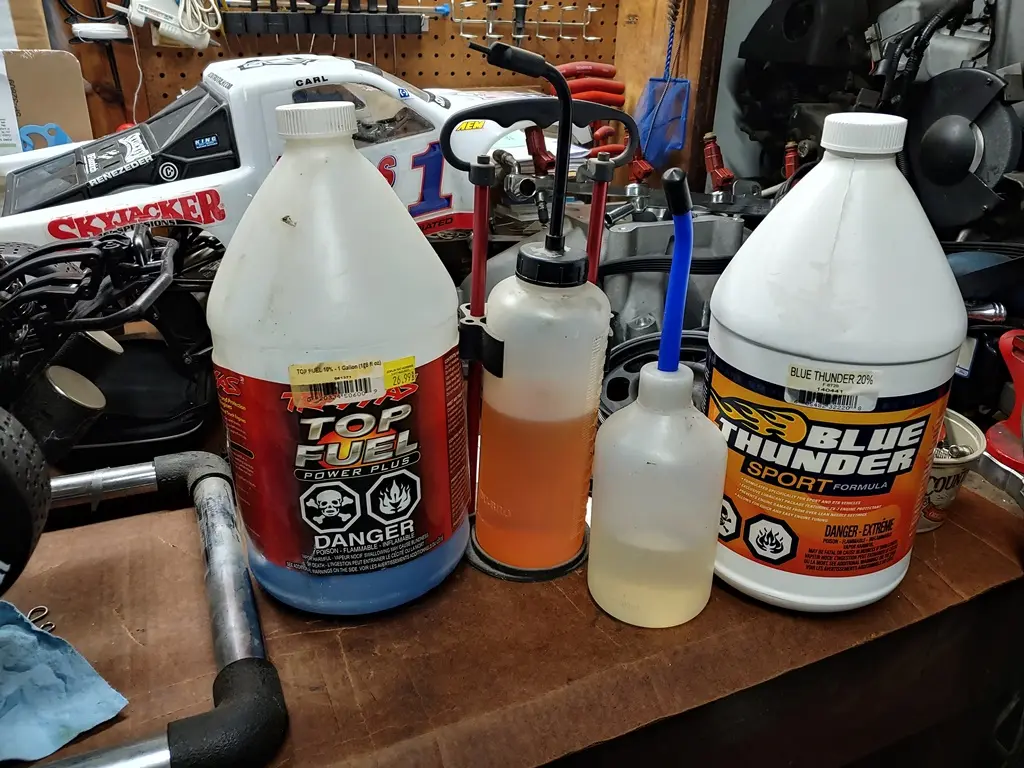
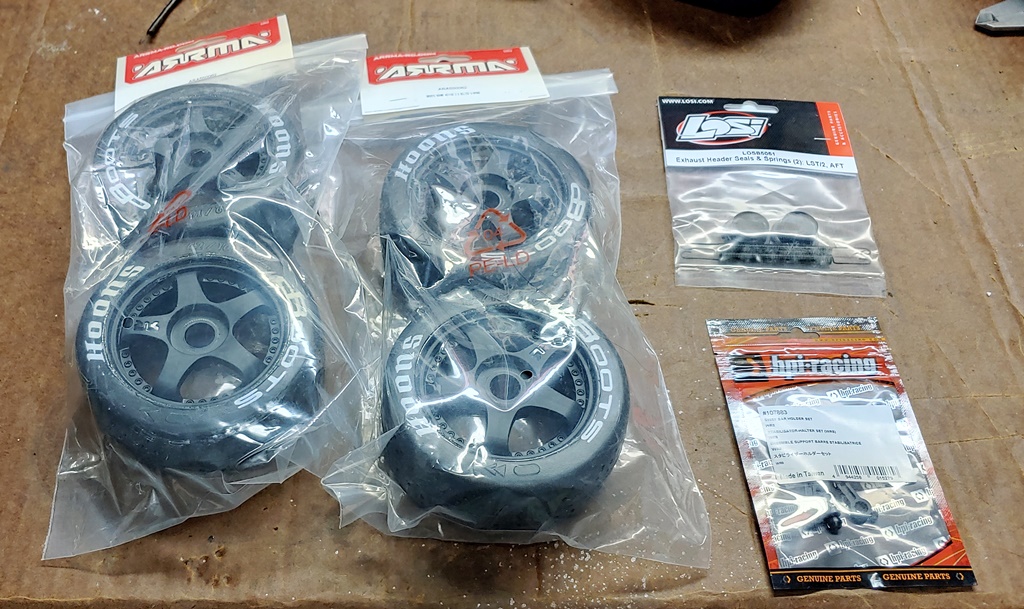
That night, not finding Associated parts available, I found an HPI sway bar end link kit that I thought would fix the SC8. I also had to order a header pipe seal and retaining spring. Again no Associated parts so I ordered Team Losi parts I know those are the same for this fix. I also found some neat street wheels and tires too luckily all from one supplier. All that is ordered
.
The next day I start with cleaning up the main chassis. I am not taking every single thing apart since nothing appears broke or damaged. I use some spray cleaner and then wipe it down with my special sauce cleaner to make it look almost new.
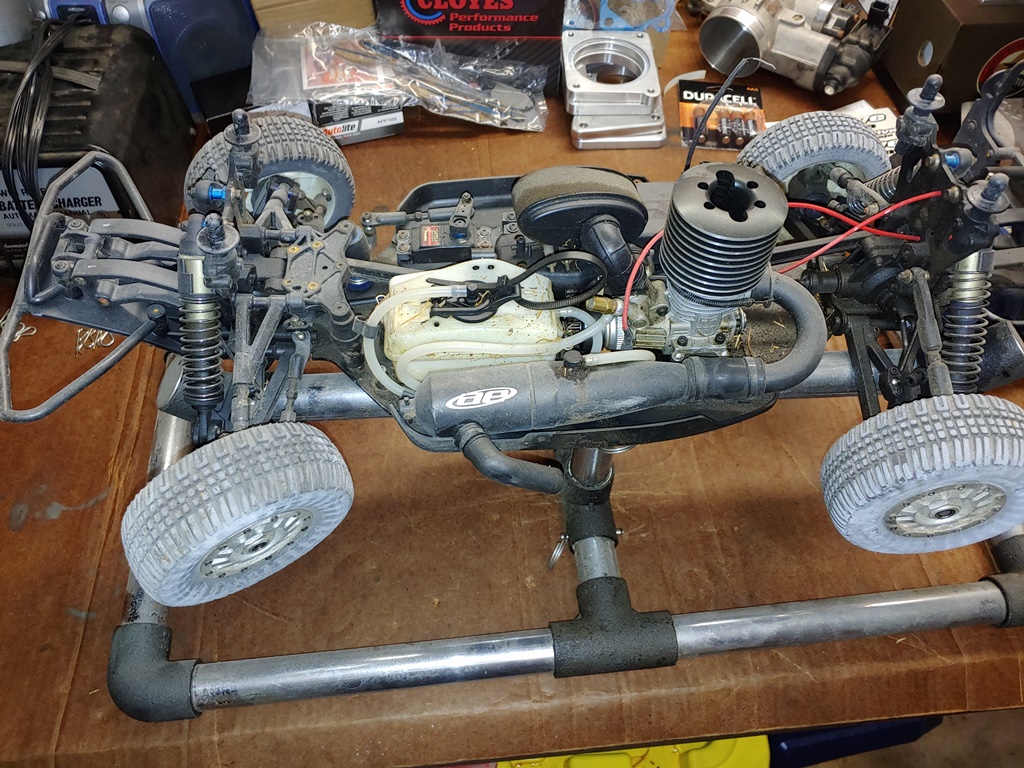
Next up we go back to the motor. Taking out of the fuel soak, I spin the crank and yay! Nice and smooth. I spray off the owb with brake kleen, wipe it dry and check that it's functioning on the starter shaft. With that all good, I check the fit of the piston/sleeve. It looks perfect and the pinch feels great.
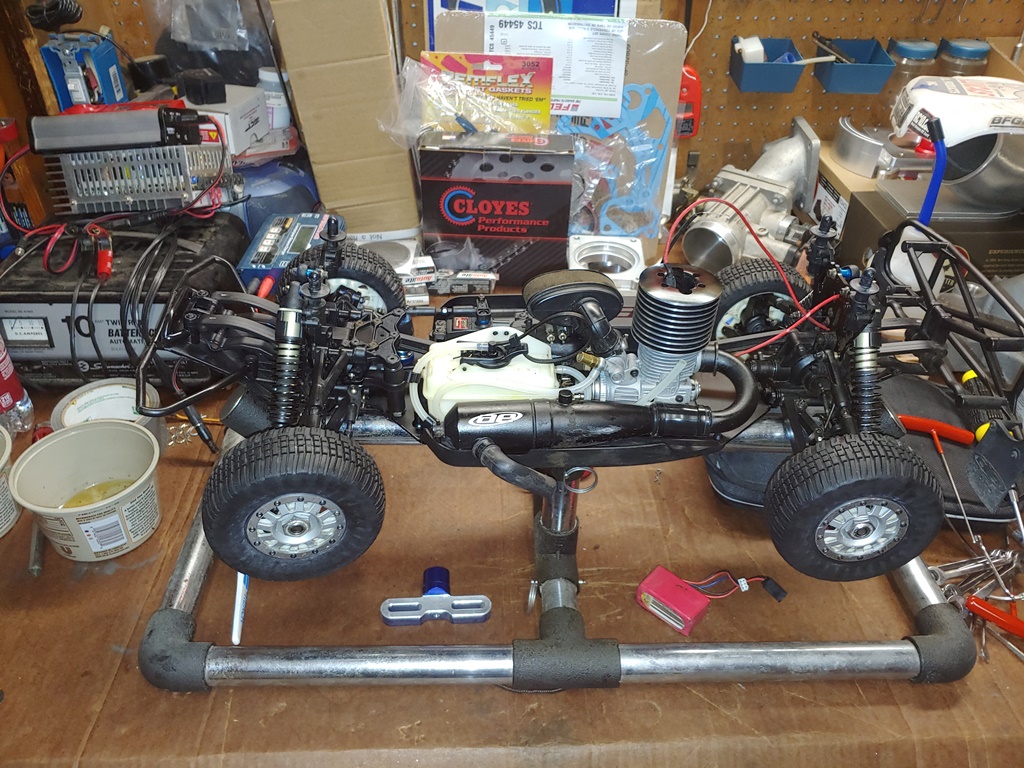
So I put the motor all back together bolt it to the chassis, set the spur mesh and set the pipe in place. I use WD-40 on the tires to try to moisturize them and make them look nice too.
Then I install them on the chassis.
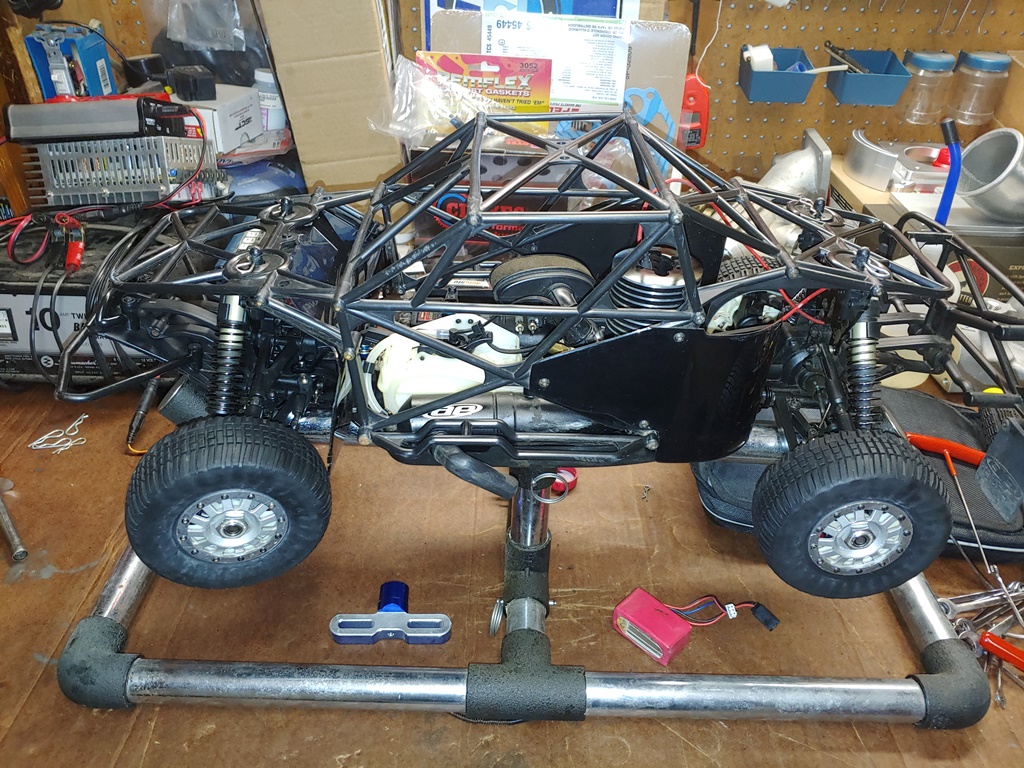
I wash and clean the roll cage with my special sauce and put it in place.
And finally, I wash the body and install it. That's all I can do for now until the new parts arrive.
The parts arrive pretty quick so now let's go back and fix what's broken.
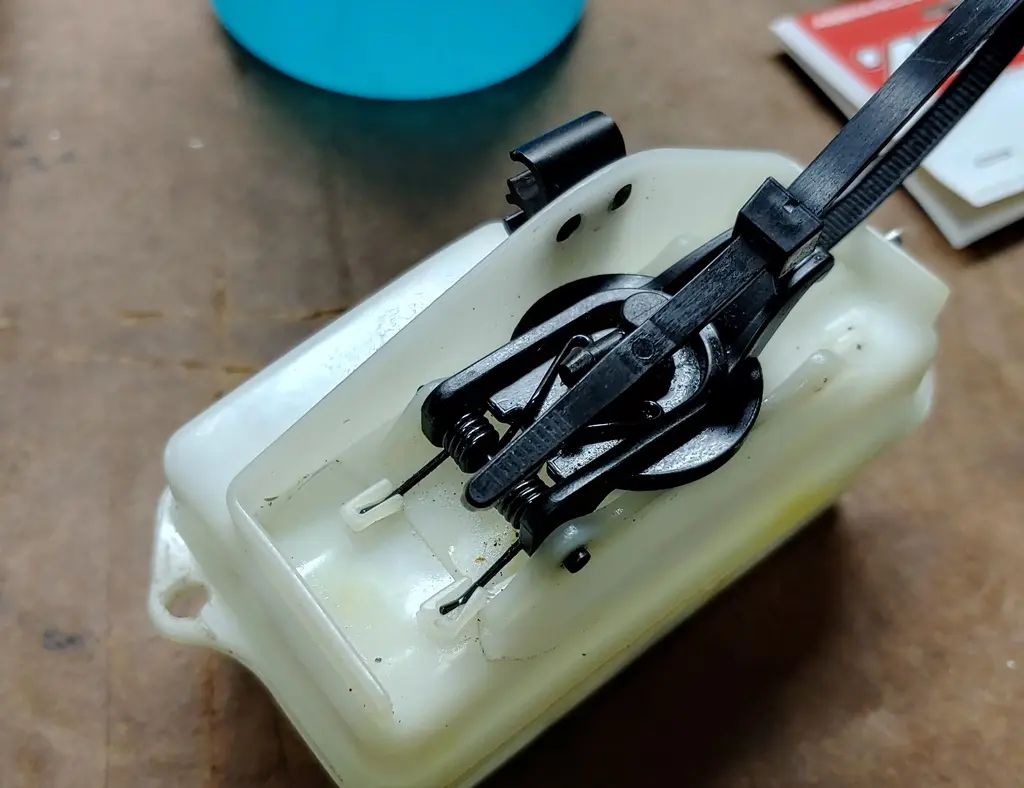
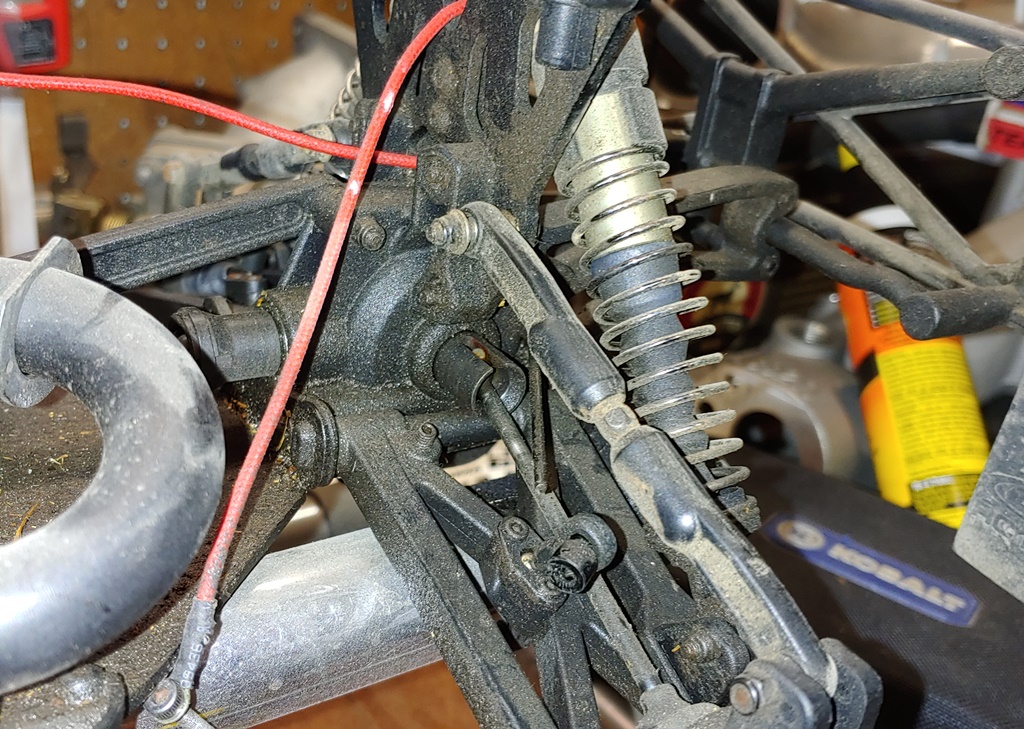
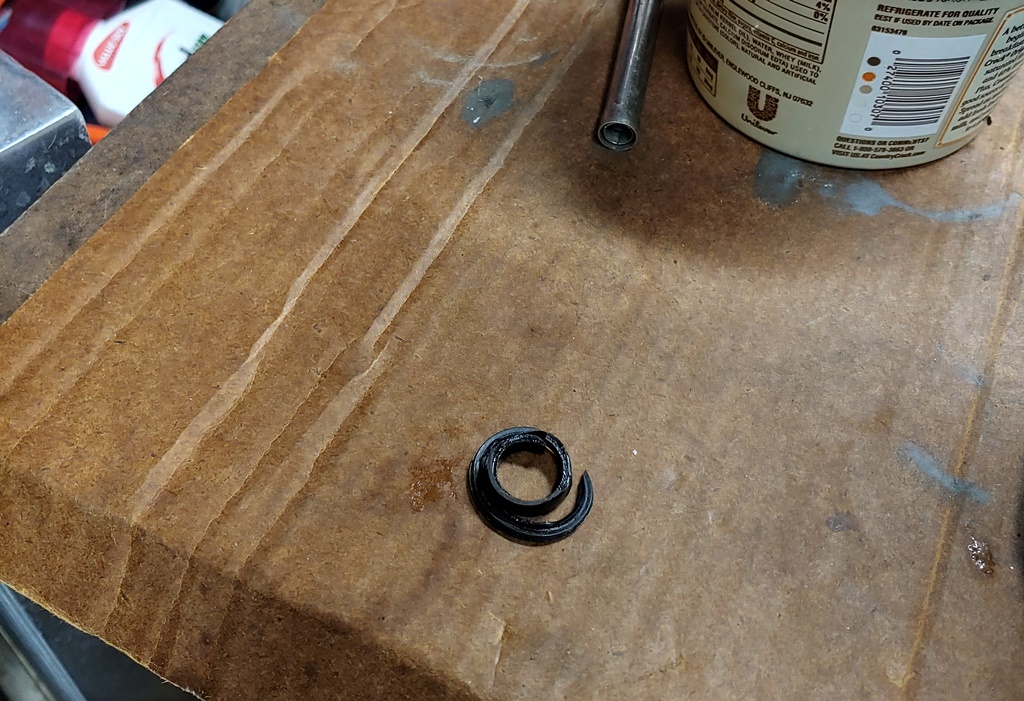
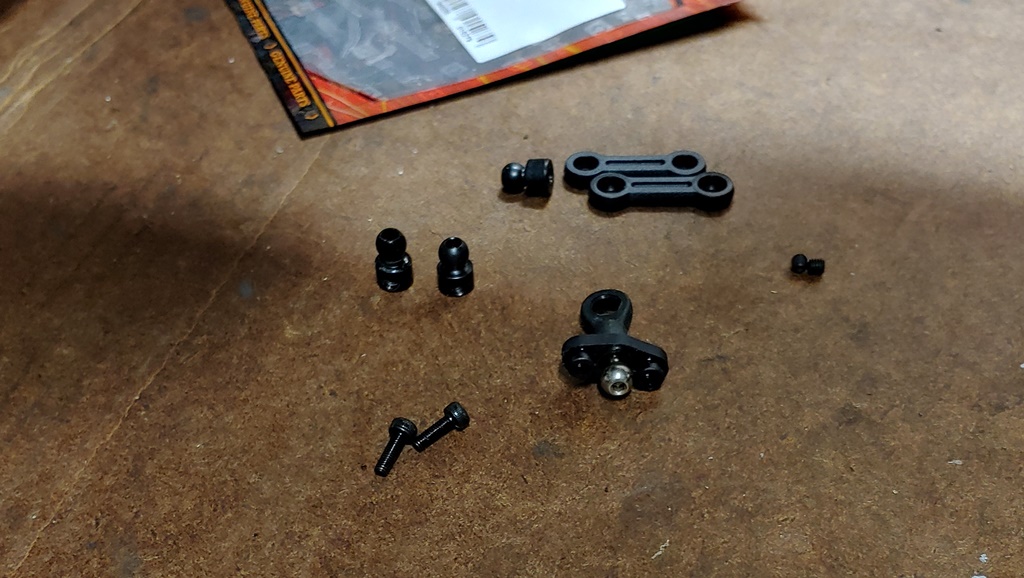
It turns out that the loose steering link is just a loose nut. I put some locktite on it, re-tighten it and that's done. Next is the rear sway bar. What has happened here is the lock nut in the ball-link end came loose, stripped and fell out. I was right, the HPI parts kit had a ball end insert with new set screws. So that was also an easy fix. In the pic, the worn out one is the left one of the two standing side by side.
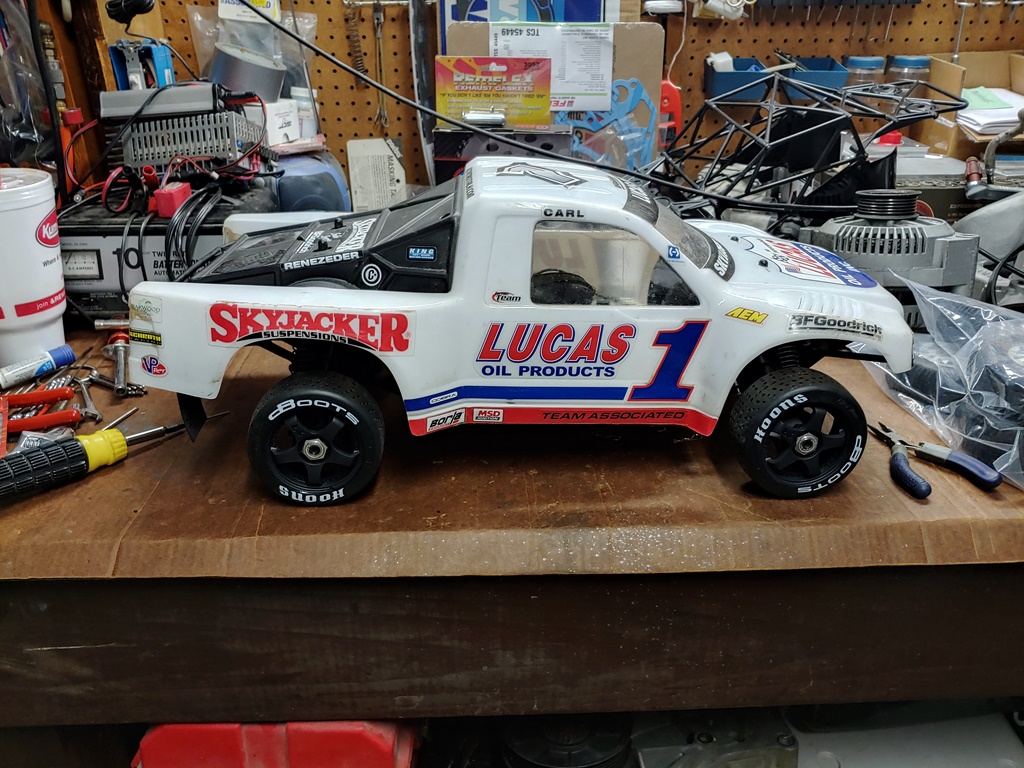
Next was to install the new header seal and attach the header/pipe unit to the motor. Installing the new retaining spring wasn't without a struggle but it's on. Finally is to put on the new shoes, replace the roll cage and put on the body. It looks great but the stance just isn't right for street/parking lot running.
Looking for a remedy I notice I have a lot of spacers in the springs so I remove all of them. That makes sit how I want but the suspension feels too soft. I will figure out what I want to do with that later. Next thing I will do is see if it will run. I will update you on that later, for now I'm done. It's time for a cold one, DR PEPPER that is!

For those that haven't seen an SC8, it is a nitro powered 1/8th scale short course truck. It is one of my favorite trucks and I actually bought it thinking there would develop a class for them so I could get in to racing. But other rc makers didn't get on board with the 1/8th nitro platform so it never developed. It then became a part time basher truck that I ran mostly on parking lots and on hard packed snow. Overall though it hasn't had that much Use.
Ok, so let's get a look at it. I got l bored and lazy before I quit the hobby a few years ago so as you can see in the pic, it's a bit dirty.
The tires look dried out a bit too or that's salt from the road because if I remember correctly, a snow covered road was the last time I ran it. Let's pop the lid off and see how she looks under there.
oh yeah, there's the cage. That is one of the coolest features on the truck. It may be plastic but it's tough and does a great job protecting the import parts of the truck. It just mounts on the same way and on the same posts as the body. Let's get'er off and see what we have to work with.
Well I've seen worse. The motor is stuck, no surprise to me, and I see the rear sway bar end is not connected. A little more inspection reveals a loose and I assume, worn out steering link. The rest seems ok so I pull the wheels and the motor and pipe so I can start the repairs.
I will start with the engine. Removal of the cooling head and back plate reveals gummed up internals but no severe damage I can see. So I will remove the carb and soak the block and back plate with WD-40 and let it sit for a while.
In the mean time I will move on to checking my battery situation. OOOPS!!! I left batteries in 2 of my igniters and in the receiver box. Luckily the connection in the receiver box only has a slight amount of corrosion and is easily brushed off. Likewise, the red igniter is light and I am able to easily clean it up too. The blue igniter however looks pretty bad. To clean it I try the same solution of baking soda and water that works great on lead acid battery corrosion on a real car. This corrosion from alkaline batteries doesn't seem to work very well. But I will let it soak and move on.
I had wrapped paper around an AA battery to make it work in the red igniter but it actually uses sub-c cells. I have 2 on hand and surprisingly both have some charge in them. I picked the one with the highest charge reading and just for heck of it I hooked it on the glow plug. It actually lit the plug! So I dug out both of my chargers and started charging both the igniter and the LiPo receiver battery. Then I got the transmitter. Again I had left the batteries in it but to my surprise there was no corrosion and they were still good. Ok, so let that stuff be and move back to the engine.
Using pliers I rocked the flywheel back and forth and kept plenty of WD-40 on it. Without too much effort it free'd up and I was able to rotate the crank. I went ahead removed the piston and sleeve. I continued to lube and spin the crank but there was roughness in the bearings that wasn't going away. So I grabbed an empty butter container, filled it with old fuel and dropped the block assembly in. I quit for the day here to let it soak overnight.
That night, not finding Associated parts available, I found an HPI sway bar end link kit that I thought would fix the SC8. I also had to order a header pipe seal and retaining spring. Again no Associated parts so I ordered Team Losi parts I know those are the same for this fix. I also found some neat street wheels and tires too luckily all from one supplier. All that is ordered
.
The next day I start with cleaning up the main chassis. I am not taking every single thing apart since nothing appears broke or damaged. I use some spray cleaner and then wipe it down with my special sauce cleaner to make it look almost new.
Next up we go back to the motor. Taking out of the fuel soak, I spin the crank and yay! Nice and smooth. I spray off the owb with brake kleen, wipe it dry and check that it's functioning on the starter shaft. With that all good, I check the fit of the piston/sleeve. It looks perfect and the pinch feels great.
So I put the motor all back together bolt it to the chassis, set the spur mesh and set the pipe in place. I use WD-40 on the tires to try to moisturize them and make them look nice too.
Then I install them on the chassis.
I wash and clean the roll cage with my special sauce and put it in place.
And finally, I wash the body and install it. That's all I can do for now until the new parts arrive.
The parts arrive pretty quick so now let's go back and fix what's broken.
It turns out that the loose steering link is just a loose nut. I put some locktite on it, re-tighten it and that's done. Next is the rear sway bar. What has happened here is the lock nut in the ball-link end came loose, stripped and fell out. I was right, the HPI parts kit had a ball end insert with new set screws. So that was also an easy fix. In the pic, the worn out one is the left one of the two standing side by side.
Next was to install the new header seal and attach the header/pipe unit to the motor. Installing the new retaining spring wasn't without a struggle but it's on. Finally is to put on the new shoes, replace the roll cage and put on the body. It looks great but the stance just isn't right for street/parking lot running.
Looking for a remedy I notice I have a lot of spacers in the springs so I remove all of them. That makes sit how I want but the suspension feels too soft. I will figure out what I want to do with that later. Next thing I will do is see if it will run. I will update you on that later, for now I'm done. It's time for a cold one, DR PEPPER that is!
Last edited: