Benefits:
– Improved durability
– Improves steering capabilities
– Enhances handling and overall performance
Parts Needed:
1 Set – OFNA Servo Saver Set (Part # 18034)
1 Set – OFNA Clutch Bell Shim Kit (Part # 10099)
1 Set – OFNA Aluminum Servo Arm (Part # 10732) OR Any Brand of Futaba Servo Arm
2 Sets – Duratrax 6x10mm Ball Bearings (Part # 1561) OR Any Brand of 6x10mm Bearings
Directions:
As with any set of directions, there are more than one way to do things. So use these as a guideline and use your own judgment when doing your mod. Let's begin:
1. Unscrew the following 4 screws (on both sides of the truck) in order to remove the front end.

2. Now slide the front end straight off the TVP's.
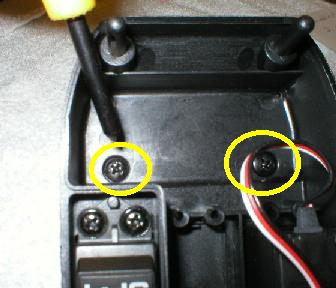
3. Look on the bottom of the front end and unscrew the 2 screws that hold the steering posts in place.
4. Unscrew the turnbuckles, steering arm, the round servo saver and the attached arm from the front end along with the top screws which hold the top of the steering posts as seen in the image below.
5. Now both steering posts should be off of the truck. Next you need to pull the metal bolt out of the center of BOTH steering post. Place the bolts to the side b/c you will need them later.
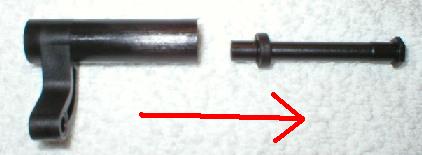
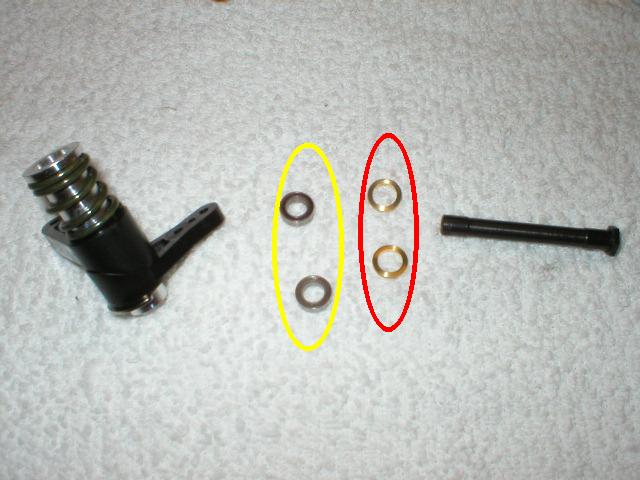
6. Now open your package for the ofna servo saver. You will see 2 posts and 4 brass bushings. Place the 4 brass bushings to the side (we will NOT be using them). Instead you will be using the 6x10mm Ball Bearings. I am on a budget so I used the Duratrax Ball Bearings.
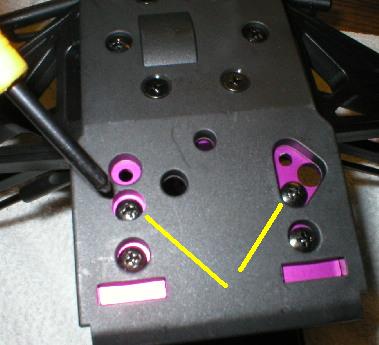
7. Now rip open the ofna shim kit and look for two brass colored shims. They will be the about the same diameter as the ball bearings. In the pic below, you can see the ball bearings in yellow and the brass spacers in red.
8. Take each ofna steering post and insert one ball bearing into each end of the post. Make sure you do both steering posts.
9. Now take one of the brass shims and slide it onto the metal bolt. The brass shim should be right next to the hex shaped end on the bolt. Then simply insert the bolt into the ofna steering post. Make sure that the ball bearings do not pop out when you slide the bolt into the steering post.
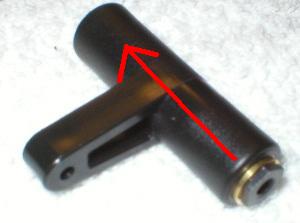
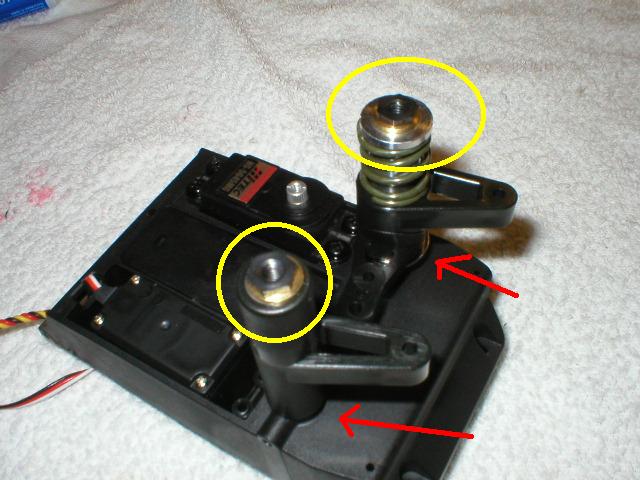
10. Now it's time to reassemble everything. Simply screw the two screws from the radio tray back into both of your new ofna steering posts. Make sure that the hex part of the bolt is at the OPPOSITE end of the radio tray (in yellow). You want the round end of the bolt to butt up to the radio tray (in red).
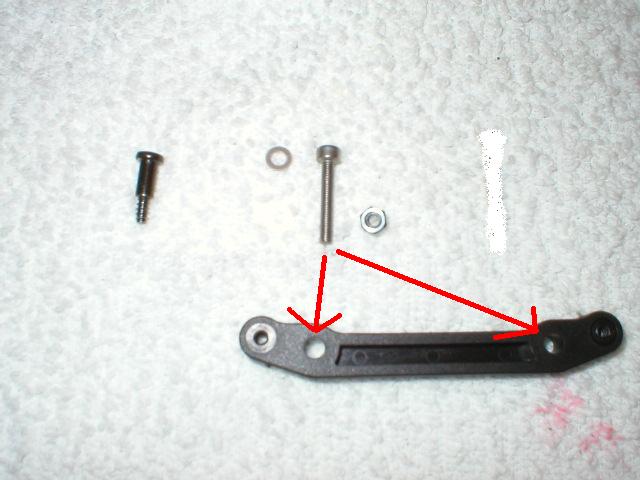
11. Now you can put the steering arm back onto the steering posts. Instead of using the stock screws, I used a stainless steel 3mm x 20mm bolt with a 3mm washer & 3mm nylon lock nut. This will give you more durability and improve steering. Make sure that you pick a bolt that is smaller in diameter than the holes on the steering arm. The smaller diameter will reduce any friction on the steering arm.
12. Screw a nylon nut onto the end of your bolt to lock the steering arm onto the steering post.
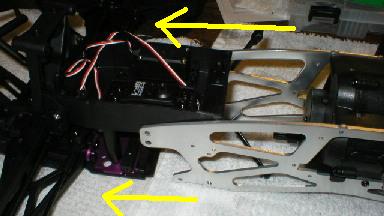
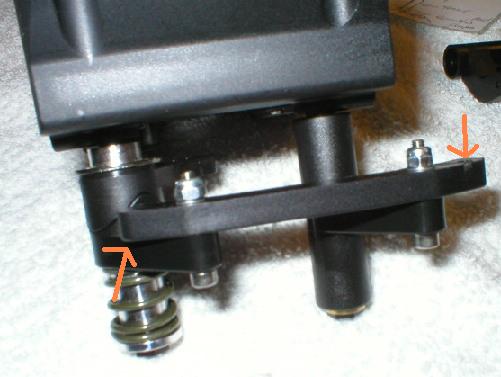
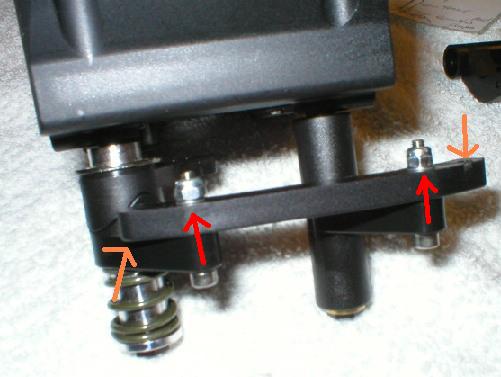
13. The next couple of steps are very important and have many things to pay attention too. When you bolt the arm onto the ofna posts make sure that the bend on the end of the arm is pointed towards the front of the truck (away from the radio box). In the picture below you can see that I did it WRONG and had the arm facing the wrong way (orange arrows). Luckily I realized it after I took the picture and corrected it.
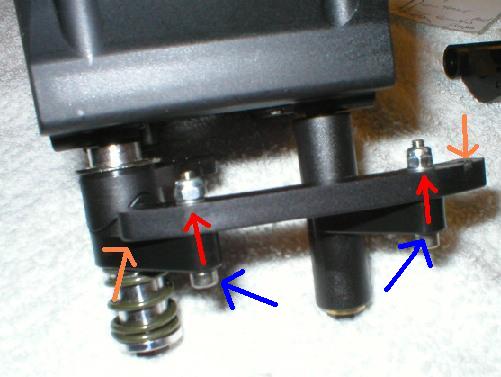
14. You can also see how the nuts and bolt were inserted into the steering posts (red arrows). Do NOT tighten up the bolts all the way. You only want the nylon nuts to simply hold the bolt in place and NOT place any friction on the steering arm.
15. You also need to make sure you attach the arm onto the TOP side of the steering posts. If you attach it onto the bottom side, you won't be able to mount everything back into the truck b/c the steering arm will hit on the dog bone drive shaft. The blue arrows show the WRONG side to mount the arm. Make sure you attach it to the top (as seen in the picture).
16. Now you can install the futaba arm onto your stock servo and bolt it onto the steering post. If your considering upgrading your steering servo now would be a perfect time then ever.
17. Once you have assembled those screws, it is a good idea to test your setup b/f you finish reassembling everything. You can simply move the servo arm and see if you feel any tension anywhere. Your steering linkages should glide back and forth very smoothly and with little effort. If your set-up passes this test, then you should do another test. Hook up your radio and power up your steering servo and test it with your radio. If it passes both tests, then its time to finish reassembling everything.
18. To finish reassembly: Reattach both turnbuckles back onto the steering arm and screw the bottom of the steering posts back onto the front skid plate.
19. Now re-attach the front end back onto the TVP (8 screws – 4 on each side). Make sure you put the dog bone back into the cups when you put the front end back on.
20. Now go bash and enjoy your work.